The post Chocolate Mug Cake Recipe appeared first on Bubli's World Cuisine.
]]>
This is my go to recipe for having dessert no matter what time it is and what mood I am in. It’s just such a tasty and easy recipe for a delicious chocolate cake. And the best thing is it does not require much. Few pantry friendly ingredients and a microwave.
My Pinterest is always loaded with so many thank you comments since I have posted this chocolate mug cake! Every single day I would get messages from dessert lovers saying so many good things about trying out this simple delicious no fail chocolate mug cake recipe. It makes me very happy, honestly.
This is a YUMMY chocolate cake recipe for busy people, students and kids but it works for everyone!!
The Best Chocolate Mug Cake Recipe
It’s a 1 minute cake recipe!
Works amazing for busy people who loves their dessert.
You can make them Dairy free by just substituting the kind of chocolate & milk to a dairy free ones and they taste amazing.
A delicious treat for your mid night cravings.
A great recipe for beginner bakers.
Makes a quick dessert treat for kids after school or even after dinner.

Even if you have never made a cake from scratch and dare not to, do not worry this one is a no fail one and even kids can make this one because it’s that simple. It’s just mix and microwave and enjoy!
Cake In A Mug That’s Your diet Friendly
Most mug cake would call for milk. For this particular recipe, you can make some alterations according to your diet. If you are lactose intolerant, simply substitute to vegan or dairy free milk make them according to your diet. It’s also applicable for the use of chocolate. You can absolutely substitute regular chocolate to a Dairy Free one and still be able to enjoy a great fluffily tasty Mug Cake.
My other Dessert recipes you might like:
Recipe Video: 1 Minute Microwave Chocolate Mug Cake Recipe
I have created a recipe video for making this quick and easy delicious chocolate mug cake recipe and have already posted the video on my YouTube channel Bubli’s World Cuisine. It’s a step by step visual demonstration on how to make this tasty chocolate dessert in a minute. To see the recipe in action from start to finish, please click on the video. And for a printable version of this recipe please check the recipe card at the end of the blog:
1 Minute Microwave Mug Cake Ingredients List
- Flour – Regular plain flour will do the job.
- Sugar – White granulated sugar but can be substituted with brown.
- Cocoa Powder – Gives intense chocolate flavour making the mug cake rich.
- Baking Powder – Helps the mini cake become fluffy and rise.
- Oil – Makes these mug cakes light and soft.
- Milk – You can substitute with lactose free milk or plant based ones.
- Chocolate Chunks – Try to use quality chocolate for best result. You can use milk, dark or white.

How To Make Rice Chocolate Mousse:
Step-by-Step Instructions For How to make chocolate mug cake in the microwave in 1 minute:
Step 1: Mix The dry Ingredients
In a mug put Flour, Sugar, Baking powder & Cocoa powder and mix well.
Step 2: Mix In Wet Ingredients
Now add Milk & Oil and give a good mix to combine everything well.
Step 3: Add Chocolate
Now add roughly broken chocolate to the batter and push them on the batter.
Step 4: Cook In The Microwave
Place the mug in the centre of the microwave and cook for 1 minute in medium high. You might need to check at 45 seconds as every microwave oven is bit different in terms of heat.

Choosing the Right Ingredients:
Chocolate & Cocoa are the key ingredients for making this delicious fluffy Chocolate cake in a mug and hence the type of chocolate & Cocoa you choose is crucial for the desserts final taste. Opt for high-quality dark or semi-sweet chocolate and good quality cocoa for this recipe. The better the chocolate & cocoa, the more delicious your 1 minute chocolate cake will be.
Now, if you would like to make them Dairy Free, just substitute for Dairy free chocolate and you are good to go with same ration for the rest of the ingredients. And I’m sure so many people will find this recipe a very useful and tasty one for that.
I have noticed a huge difference in flavour depending on what type of cocoa and chocolate used in the baking. Try to use quality Cocoa and chocolate for best results.
1 Minute Microwave Chocolate Mug Cake Recipe
Ingredients
- 2 Tbsp Flour
- 1 Tbsp Sugar
- 1 Tbsp Cocoa Powder
- 1/4 tsp Baking Powder
- 3 Tbsp Milk
- 1 Tbsp Oil
- Chocolate Chunks
Instructions
- In a mug put Flour, Sugar, Baking powder & Cocoa powder and mix well.
- Now add Milk & Oil and give a good mix to combine everything well.
- Add roughly broken chocolate to the batter and push them on the batter.
- Place the mug in the centre of the microwave and cook for 1 minute in medium high. You might need to check at 45 seconds as every microwave oven is bit different in terms of heat.
Did You Make This Chocolate Mug Cake?
Feel free to share your pics with me.
I am on Instagram @bublisworldcuisine
Follow me on Pinterest for more.
Tips for Perfect NO FAIL 1 minute Mug Cakes
- Mix Mix Mix: To make really delicious fluffy mug cake you must make sure you have everything well combined. Stir dry ingredients well and then give a good mix after adding the wet making it the perfect batter.
- Test your microwave: Every microwave is different. Make sure you have the right temperature. You might need to keep them in the microwave for more or less seconds.
Tips for Perfect NO FAIL 1 minute Mug Cakes
I love making mug cakes. They are easy and delicious. And the best part is they are small portions – single servings which make it so much easier for me to enjoy a piece of dessert. Over the years I have experimented with mug cakes using different ingredients and flavours and many of them has come out amazing. Although this recipe for making Chocolate mug cake is my most favourite, there can be many other tasty variations.
Nutella Mug Cake – Made with dollop of delicious Nutella in the middle of the cake and come out soooo good.
Biscoff Mug Cake – Adds a twist of tasty Biscoff flavour to the cake making it different than other mug cakes cakes.
Peanut Butter Mug Cake – An absolute treat for peanut lovers. It’s a chocolate cake with Peanut butter or chips on the batter making it nutty and bit salty which balances the sweetness of the cake.
Vanilla Mug Cake – Vanilla mug cakes can me made fun by adding sprinkle to them. Adding chocolate chips can also be a tasty idea.
Cinnamon Roll Mug Cake – A lot of people loves Cinnamon flavour on their cake. These mug cakes are made with cinnamon sugar paste and cake mix and is a tasty one.
And many more!
If you’re looking to impress your friends and family with a dessert that take only a minute to bake and is tasty as well, give this 1 minute microwave Mug Cake a go and I’m sure everyone will be surprised. This recipe surely is an impressive one and the best Chocolate mug cake recipe I have ever tried. Happy Baking!
If you like this delicious quick cake in a mug recipe in the microwave recipe, you might like my other recipes too. I would like to invite you to subscribe to my mailing list which is absolutely free. It will help you get updates on all my future posts. I post 3-4 recipes every week. Next time when I post a similar recipe or something interesting you will get notified if you are on our mailing list. Thank you for checking my blog post.
FAQS
What Is Cake In A Mug
Mug cakes are cake made in a mug, they are single serving cake and usually made in the microwave. As these cakes are single serving small portions, they cook quickly and if done properly with good mixing and proper timing, you will end up having cake that are perfectly done from inside and so moist.
How do you make Cake In A Mug
Mug cake recipes calls for simple ingredients and the cakes are so rich in taste and flavour. It’s as simple as mixing all dry ingredients in a mug and adding wets to that. Good stirring to ensure everything is well combined and then a minute or so in the microwave to cook the cake. Simple.
Why do my mug cakes never work?
Mug cakes are really simple to make and a good recipe should give you fluffy tasty Mug cakes. Make sure to stir everything well. Put them one at a time in the centre of the microwave and keep an eye as every microwave is different. Also, it’s best to use a bigger mug so that they don’t flow outside and make a mess.
Are mug cakes safe to eat?
Mug cakes are absolutely safe to eat. Microwave can cook food much quicker than an traditional oven and a mug cake made in the microwave should be safe to eat even for kids.
Why don’t mug cakes use eggs?
The cooking process in a microwave is very quick. Mug cakes are small portions of cakes and can still rise perfectly without the use of eggs.
Find My Other Recipes On My Recipe Page!
Save For Yourself Or Send To A Friend
The post Chocolate Mug Cake Recipe appeared first on Bubli's World Cuisine.
]]>The post Rice Chocolate Mousse appeared first on Bubli's World Cuisine.
]]>
Why Rice Chocolate Mousse
Rice might not be the first ingredient that comes to mind when you think of mousse, but it adds an unexpected creaminess and a subtle texture that complements the rich chocolate perfectly. The rice also adds a hint of earthiness, balancing the sweetness of the chocolate and creating a well-rounded flavour profile. Plus, this dessert is gluten-free, making it an excellent option for those with dietary restrictions. Also, anyone who is lactose intolerant can enjoy this deliciously creamy dessert where rice and warm water will create a creamy blend along with dairy free chocolate to give you the mousse you were missing out.
Why You’ll Love This Rice Chocolate Mousse Recipe
It’s super simple to make and comes together very quickly.
This recipe for making Rice chocolate mousse is Gluten free making it a tasty treat for anyone who cannot have gluten in their diet.
You can make them Dairy free by just substituting the kind of chocolate to a dairy free one and they taste amazing.
This mousse is Egg free and suitable for anyone who cannot have raw or cooked eggs.
The chill in the fridge very quickly compared to traditional mousse making the wait time very less.
Make this rice chocolate mousse Your diet Friendly
If you are lactose intolerant, simply substitute to vegan or dairy free chocolate and make them according to your diet. If you are watching your weight, just skip adding honey or use less honey and they will still be nice and tasty. Add finally, it’s completely Egg free which makes them amazing for anyone who cannot have eggs raw or cooked.
My other recipes you might like:
Air Fryer Tandoori Chicken Recipe
Recipe Video: Egg Free Rice Chocolate Mousse Recipe
I have created a recipe video for making this quick and easy Rice Chocolate mousse and have already posted the video on my YouTube channel Bubli’s World Cuisine. It’s a step by step visual demonstration on how to make this delicious egg free, gluten free chocolate dessert. To see the recipe in action from start to finish, please click on the video. And for a printable version of this recipe please check the recipe card at the end of the blog:
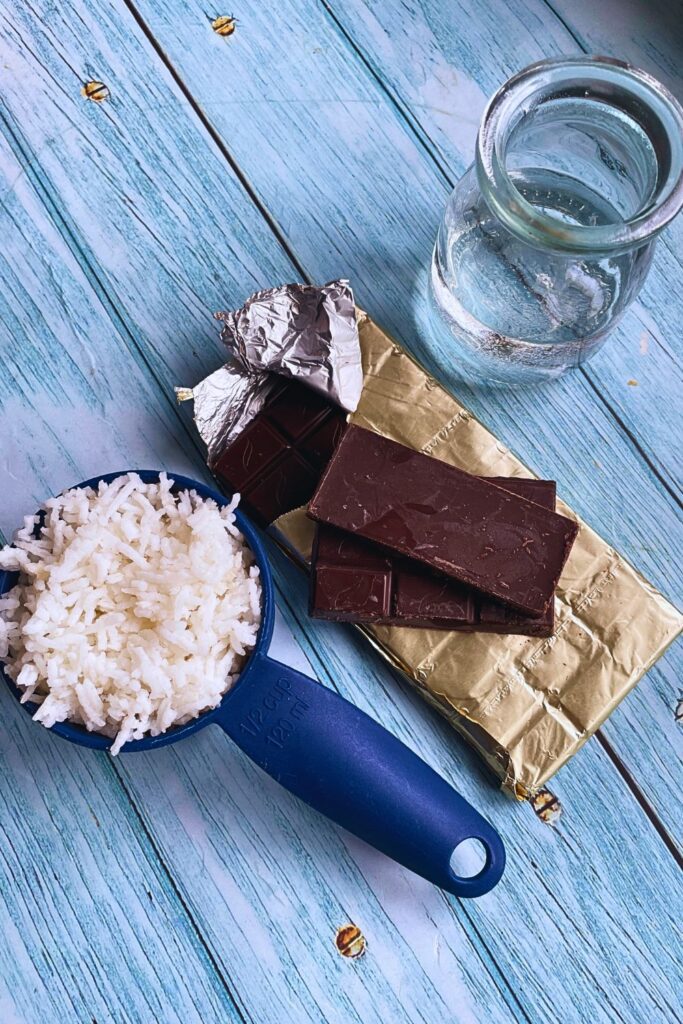
4 Ingredients Rice Chocolate Mousse
Only 4 ingredients required to make this healthy Gluten free and Egg Free creamy chocolate dessert for kids and grown ups.
- Rice – Regular cooked rice but not the sticky type.
- Chocolate – Try to use quality chocolate for best taste and make sure to use at least 50% cocoa ones.
- Water – Plain warm water.
- Honey – Honey is used as a natural sweetener for this tasty dessert treat but you can skip if you like.
How To Make Rice Chocolate Mousse:
Step-by-Step Instructions For Making Rice Chocolate Mousse
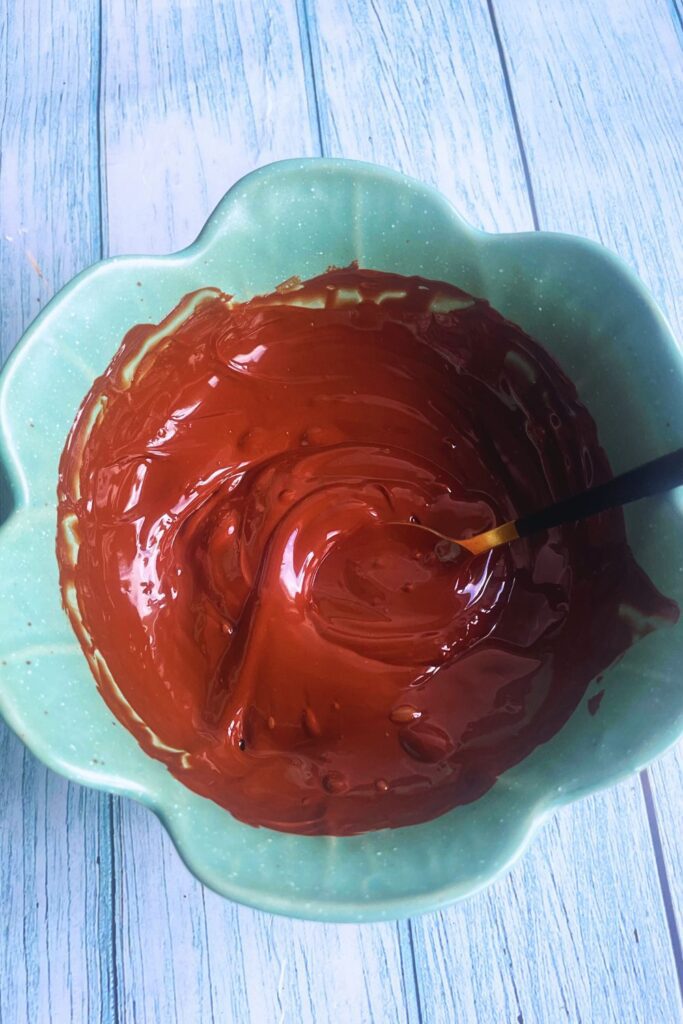
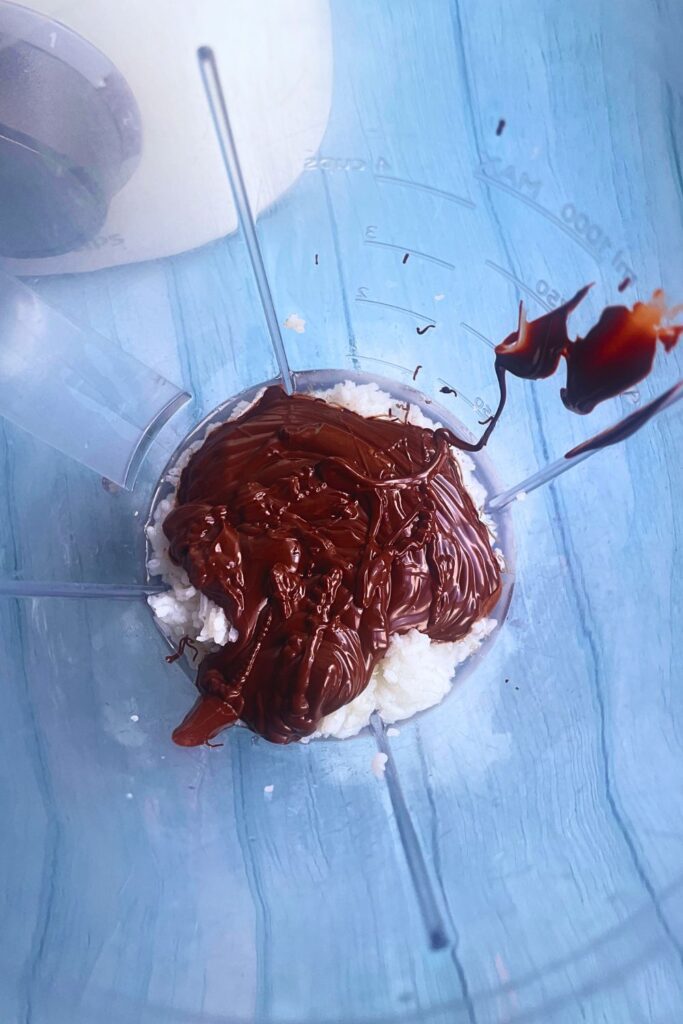
Step 1: Melt the Chocolate
Melt Chocolate. You can use a double boiler or just melt them using your microwave. I use a microwave as it’s much faster and easier.
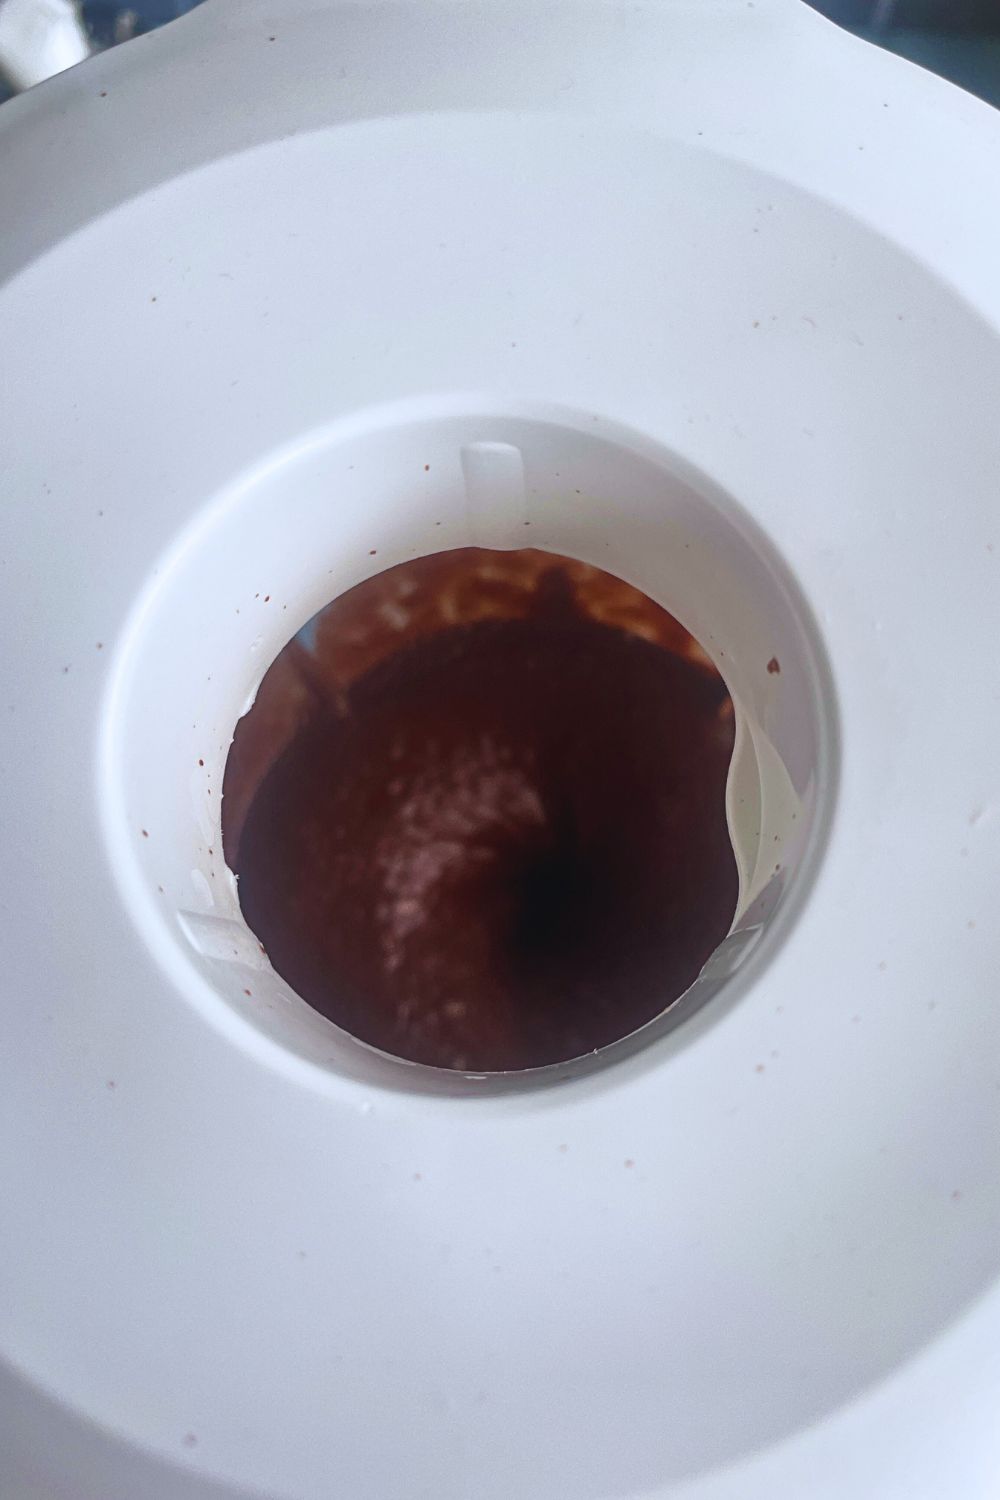
Step 2: Blend Everything
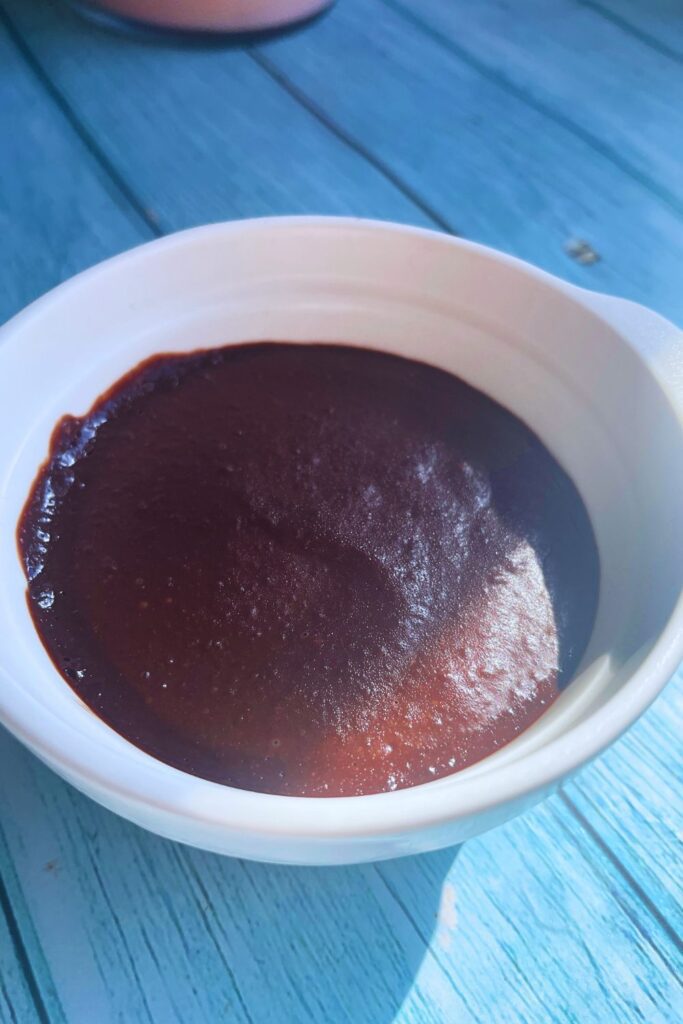
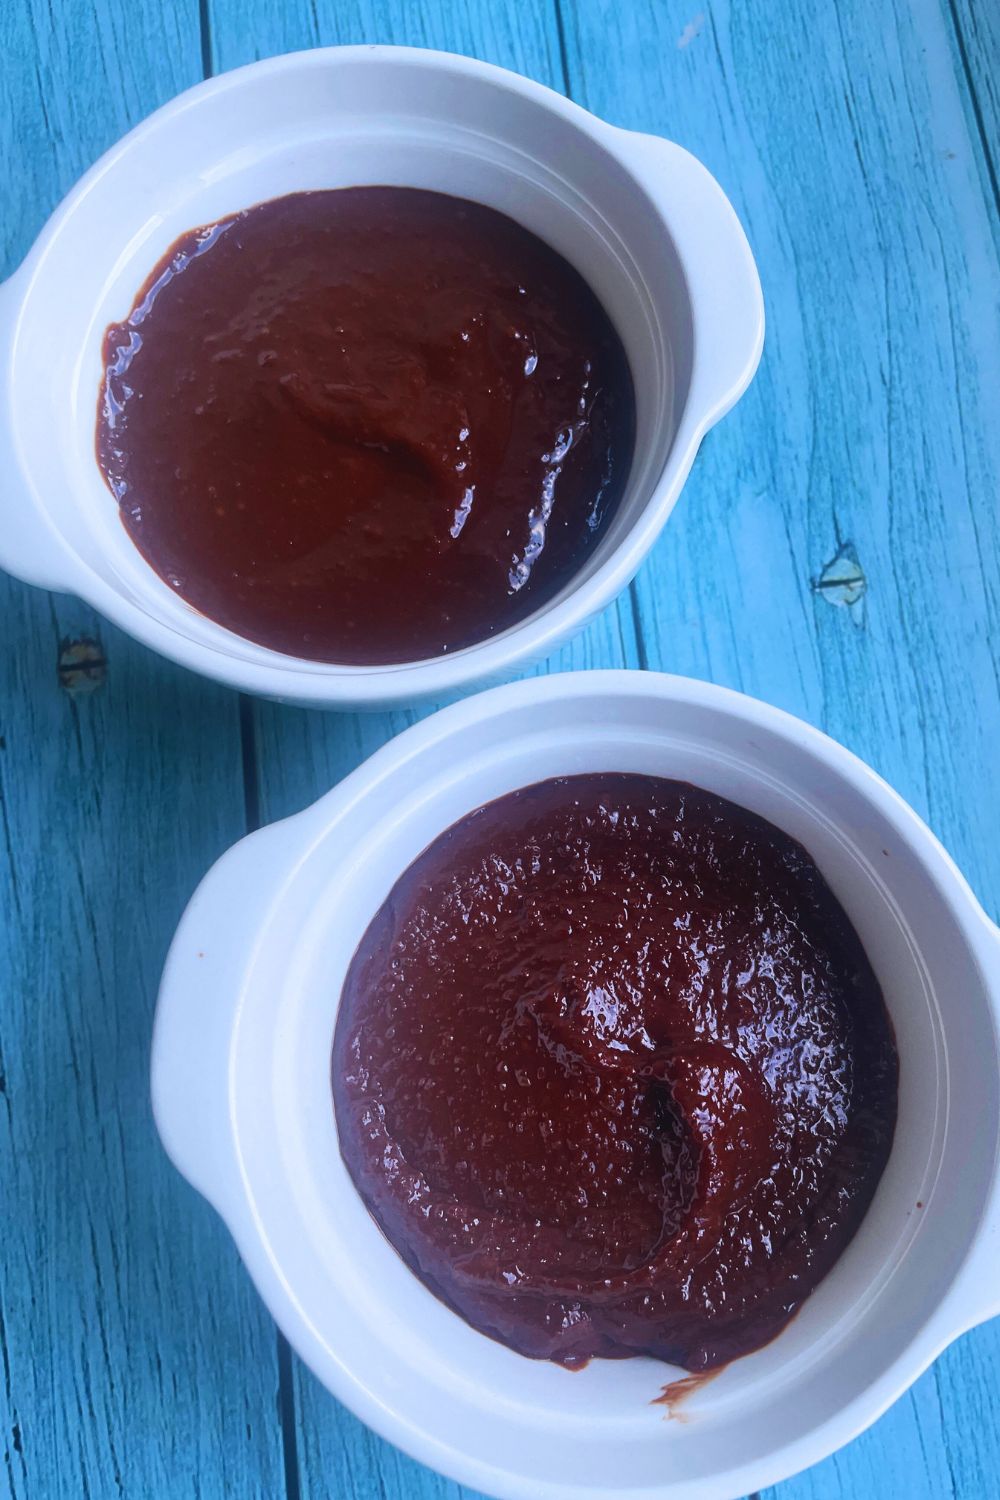
Put everything in the blender jug for making a delicious blend of mousse. Rice, Warm water, Chocolate and Honey – all goes in the blender and depending on the speed of your blender, blend until you get creamy consistency. Once you are happy with the outcome, pour them in dishes.
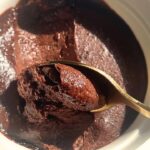
Step 3: Chill the Mousse
Now that all easy things are done, the hard part starts which is chilling the mousse and waiting for it to be ready. The good news is that it settles very quickly. Just pop the dish or small dishes in the frisge for 2-3 hours and they will be ready to enjoy.
Choosing the Right Chocolate:
Chocolate is the key ingredient for making Chocolate mousse and hence the type of chocolate you choose is crucial for the desserts final taste. Opt for high-quality dark or semi-sweet chocolate with at least 50% cocoa for this recipe. The better the chocolate, the more delicious your mousse will be. Avoid using chocolate chips, as they contain stabilizers that can affect the melting process.
Now, if you would like to make them Dairy Free, just substitute for Dairy free chocolate and you are good to go with same ration for the rest of the ingredients. And I’m sure so many people will find this recipe a very useful and tasty one for that.
I would love to hear which brand of Dairy free chocolate you have used to make this delicious Dairy free Rice Chocolate mousse.
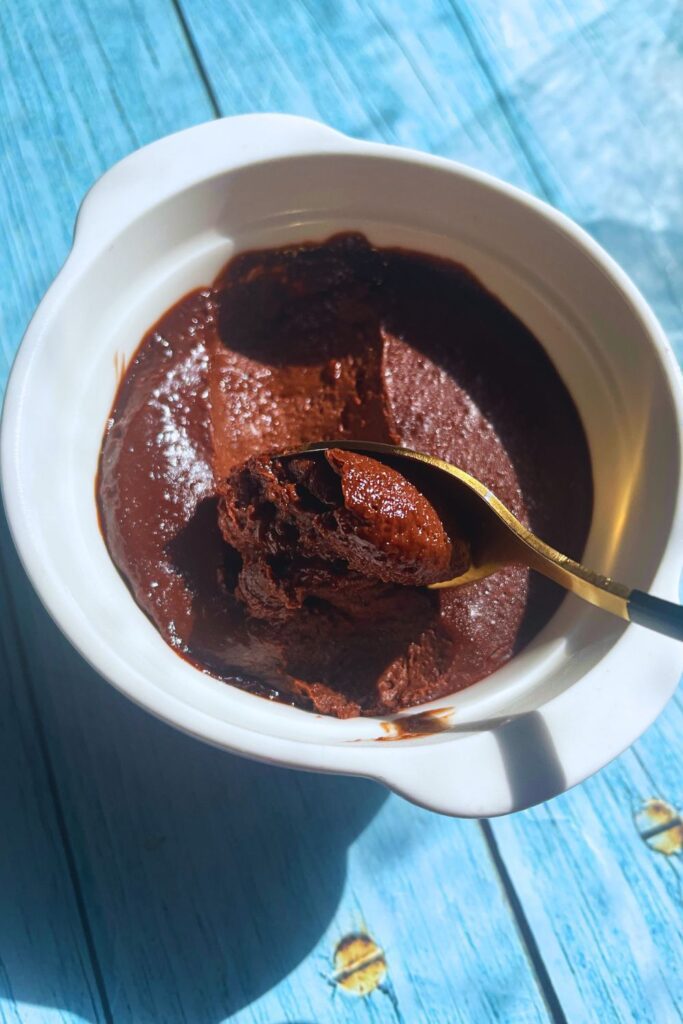
Rice Chocolate Mousse
Ingredients
- 1/2 Cup Rice
- 3/4 Cup Chocolate 50% Cocoa
- 1/4 Cup Water Might need 1-2 Tbsp extra
- 2 Tbsp Honey Optional
Instructions
- Melt Chocolate using a double boiler or just melt them using your microwave.
- Put everything in the blender jug and blend until you get creamy consistency.
- Pour in dish and chill in the refrigerator for 2-3 hours and serve.
Storing Leftover Rice Chocolate Mousse
These mousse are really delicious and finishes very quickly. However, there could be leftover or you may want to make them in advance and proper storage ensures your chocolate mousse stays fresh and delicious.
Refrigerate:
To store these Rice mousse in the refrigerator, cover them with plastic wrap or place them in an airtight container, They stay fresh in the fridge for up to 3 days. Ensure that the mousse is well covered to prevent it from absorbing any odors from other foods in the refrigerator.
Tips for Perfect Rice Chocolate Mousse:
- Rice: To make really delicious and non grainy Rice chocolate Mousse, make sure to use slightly warm rice. You can use leftover rice but make sure they have not gone hard.
- Use High-Quality Chocolate: The quality of the chocolate you use will directly affect the flavor of your mousse. Opt-in for a high-quality dark chocolate with a cocoa content of at least 50% for the best results. If you want to make them Dairy free, just substitute to Dairy free chocolate.
- Adjust Sweetness to Taste: Depending on your preference and the type of chocolate you use, you may want to adjust the amount of sweetness used. Taste the mixture before chilling and add more honey if needed.
If you’re looking to impress your friends and family with a dessert that’s both delicious and unusual, amazing for people with different diet restrictions, give this Rice chocolate mousse a go and I’m sure everyone will be surprised. Its unique texture and rich chocolate flavor make it a standout treat that will leave everyone asking for the recipe. Give it a try, and you’ll discover a new favorite dessert that’s sure to become a staple in your kitchen. Happy cooking!
If you like this delicious creamy Rice chocolate mousse recipe, you might like my other recipes too. I would like to invite you to subscribe to my mailing list which is absolutely free. It will help you get updates on all my future posts. I post 3-4 recipes every week. Next time when I post a similar recipe or something interesting you will get notified if you are on our mailing list. Thank you for checking my blog post.
Find My Other Recipes On My Recipe Page!
Save For Yourself Or Send To A Friend
The post Rice Chocolate Mousse appeared first on Bubli's World Cuisine.
]]>The post Air Fryer Dehydrated Strawberry Chips appeared first on Bubli's World Cuisine.
]]>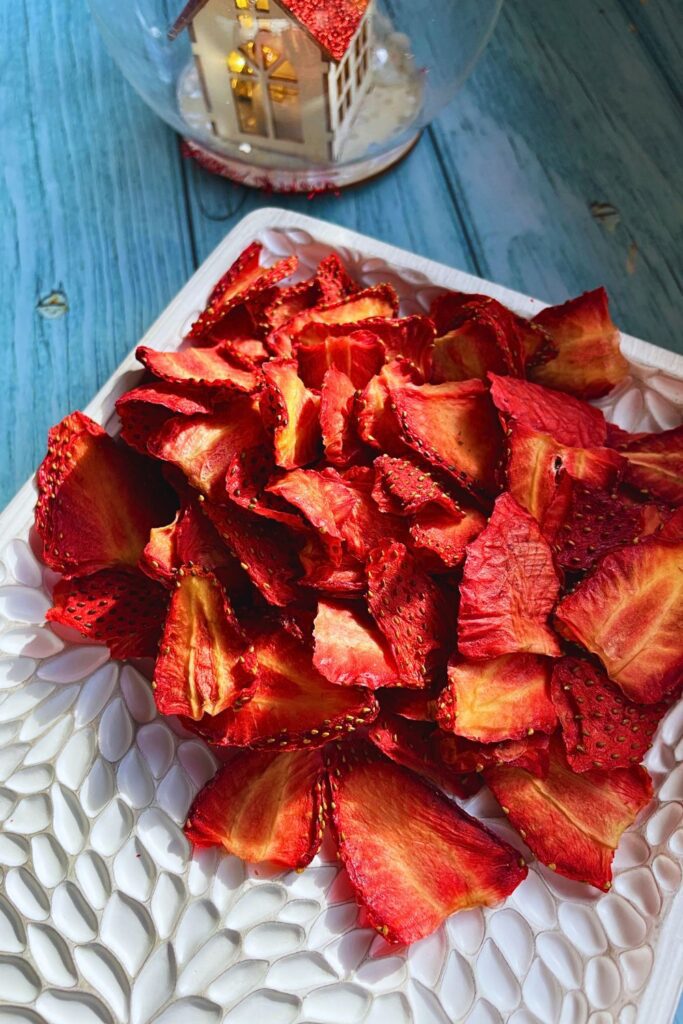
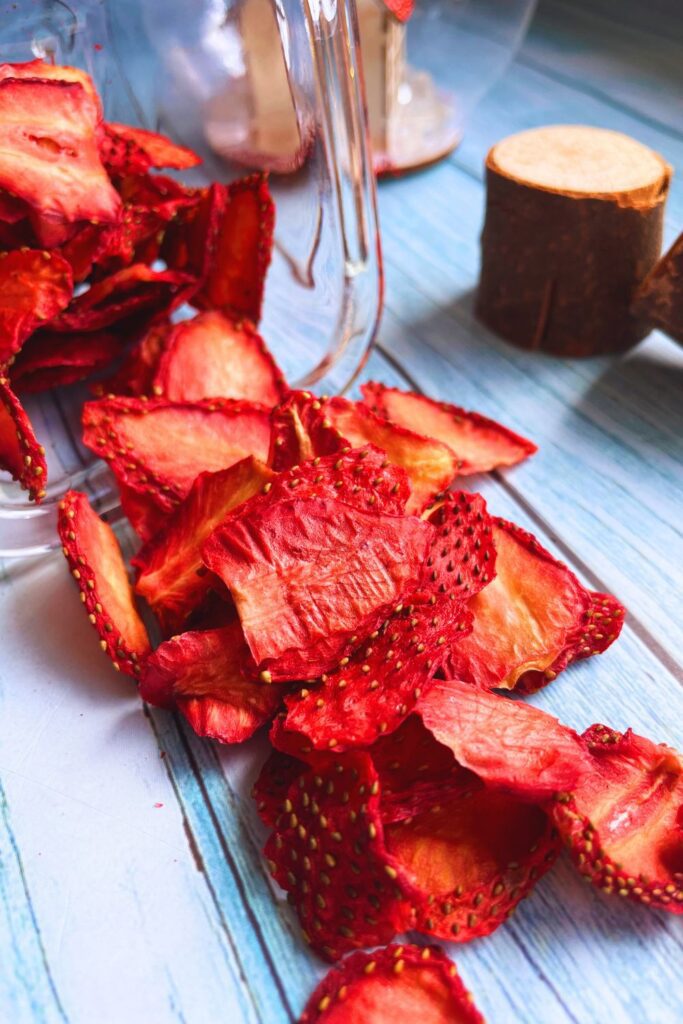
Air fryer Dehydrated Strawberry Chips
In recent years, air fryers have revolutionized the way we cook and snack, offering a healthier alternative to traditional frying methods. From savory treats to delightful desserts, the air fryer’s versatility knows no bounds. One such irresistible creation that has caught the attention of food enthusiasts is air fryer dehydrate option. If your Air Fryer has this handy option then you cam save buying another kitchen gadget and make healthy dehydrated fruit snacks at home all without using any preservatives at all.
Air fryer dehydrated strawberry chips are a delightful snack that combines the sweetness of fresh strawberries with the satisfying crunch of chips. Let’s dive into this mouthwatering recipe and explore why it’s a must-try for any air fryer enthusiast.
Why I LOVE making dehydrated strawberry in the Air Fryer
- It’s super easy to make them in the air fryer.
- It all dries out perfect every time.
- They come out all crispy and so tasty.
- Minimal work and less cleaning.
The Allure of Air Fryer Strawberry Chips
Imagine biting into a thin, crispy chip that bursts with the natural sweetness of strawberries. That’s exactly what air fryer strawberry chips offer – a guilt-free indulgence that’s as delightful to eat as it is easy to make. These chips are not only delicious but also a healthier alternative to store-bought snacks, as they contain no added sugars or preservatives.
Health Benefits of Air Fryer Dehydrated Strawberry Chips
Apart from their irresistible taste, air fryer strawberry chips offer several health benefits:
1. Rich in nutrients
Strawberries are packed with essential vitamins, minerals, and antioxidants, making them a nutritious choice for snacking.
2. Low in calories
Compared to traditional chips, these strawberry chips are lower in calories and fat, making them a guilt-free snack option.
3. no added sugar
By using fresh strawberries, you can enjoy the natural sweetness without any added sugars or artificial flavors.
4. great snacking option for weight watchers
Compared to deep-fried snacks, air fryer strawberries are lower in calories and fat.
5. customizable
You can experiment with different seasonings and flavorings to create unique variations of air fryer strawberries to suit your taste preferences.
My other Delicious Air Fryer recipes you might like:
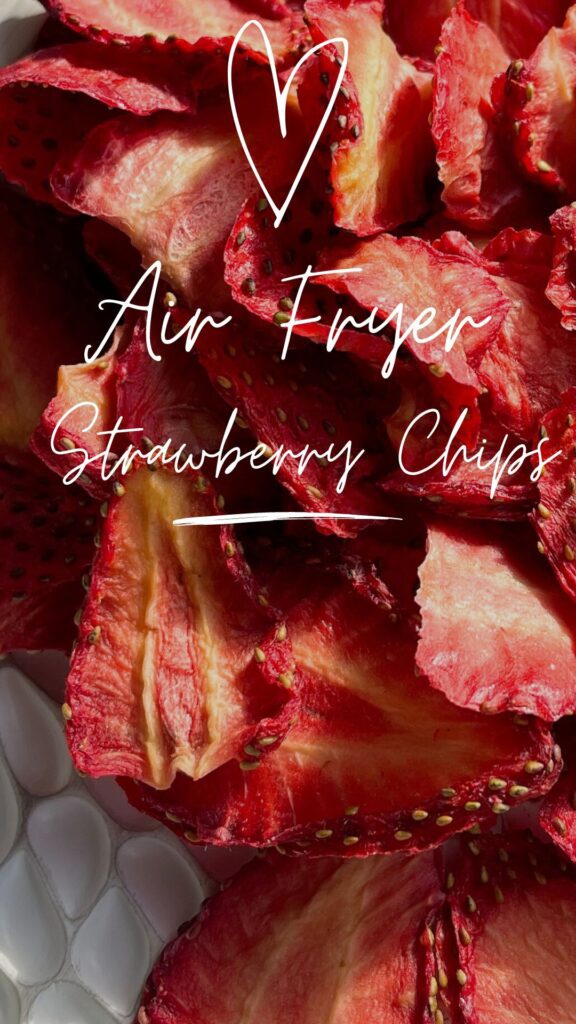
Air Fryer Dehydrated Strawberry Chips
Recipe Video: Air Fryer dehydrated strawberry chips
I have created a recipe video for making Strawberry chips in the air fryer and have already posted the video on my YouTube channel Bubli’s World Cuisine. It’s a step by step visual demonstration on how to make this flavorful crispy snack at home for lifting the taste of family dinner. To see the recipe in action from start to finish, please click on the video. And for a printable version of this recipe please check the recipe card at the end of the blog:
The easy Strawberry snacks Making the air fryer
Air fryer Dehydrated Strawberries offer a great convenient way to enjoy the essence of fresh strawberries. Through the dehydration process, ripe strawberries are dried to preserve their natural sweetness and flavor. The result is a crunchy and intensely fruity treat that can be enjoyed on its own as a snack or incorporated into various culinary creations.
Air fryer dehydrated strawberry chips are versatile ingredients, ideal for adding bursts of strawberry flavor to breakfast dishes like oatmeal or yogurt, enhancing the taste and texture of baked goods such as muffins or scones, or even as a topping for salads or desserts like ice cream. Their extended shelf life compared to fresh strawberries also makes them a practical pantry staple, ready to be used whenever a craving for strawberry goodness strikes.
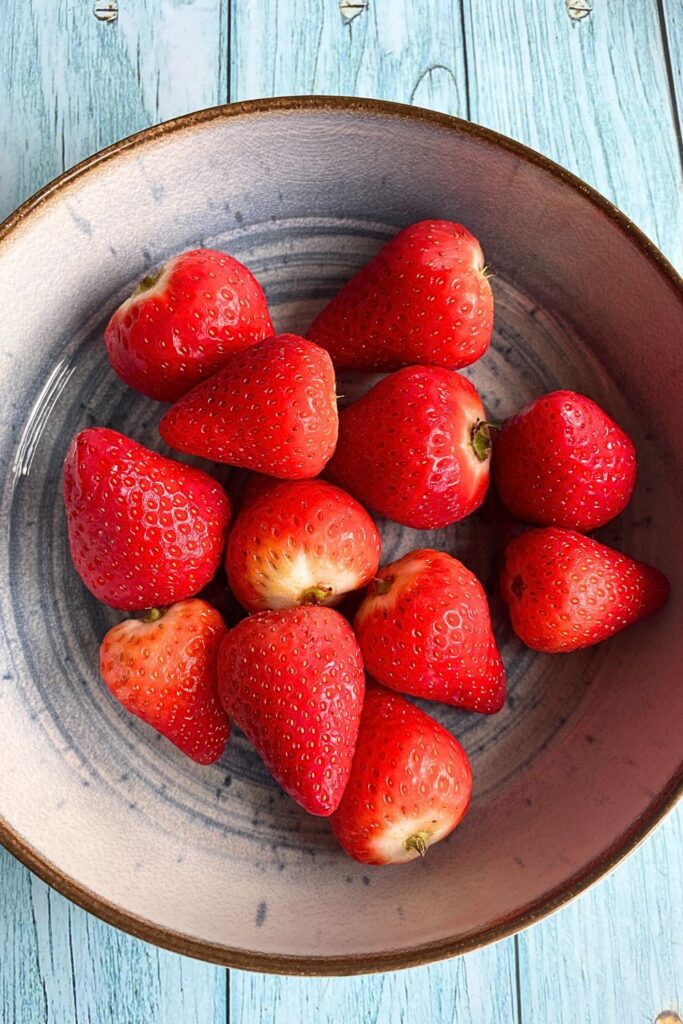
To make this delicious sugar free dried strawberries, you’ll need only Strawberries and that’s all really.
Steps to Prepare Air Fryer Dehydrated Strawberry Snacks:
Making dehydrated strawberry chips in an air fryer is a simple and efficient process. Here’s a step-by-step guide to creating this delightful snack:
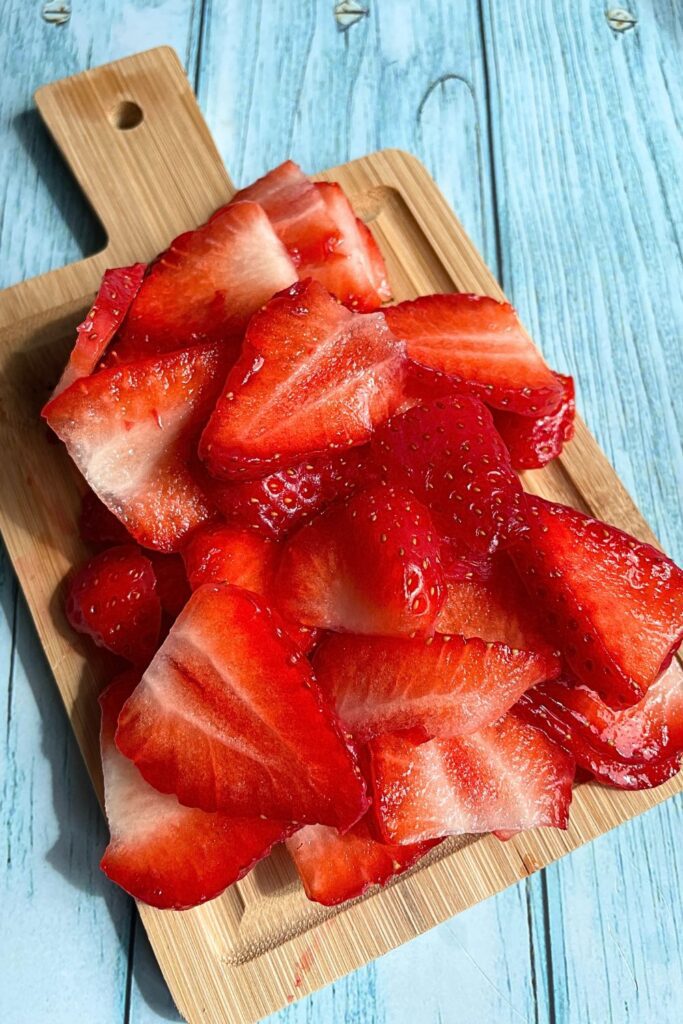
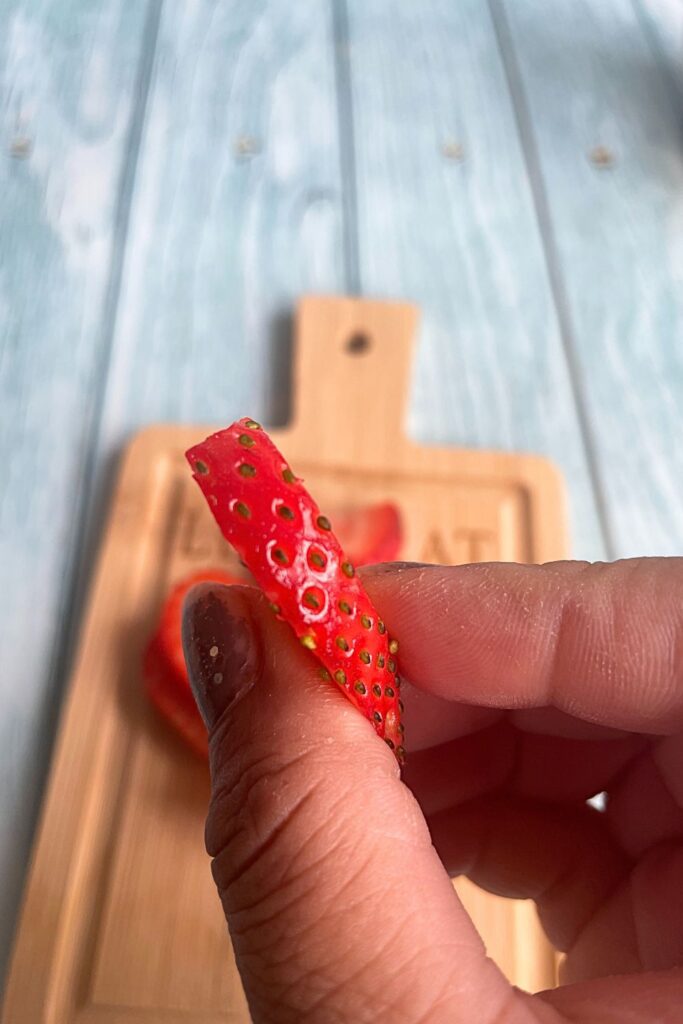
Prepare the Strawberries: Start by washing and drying fresh strawberries. Remove the stems and slice the strawberries into uniform, thin slices. The thick the slices, the quicker they will dehydrate but I like to make them bit thicker for great strawberry chips.
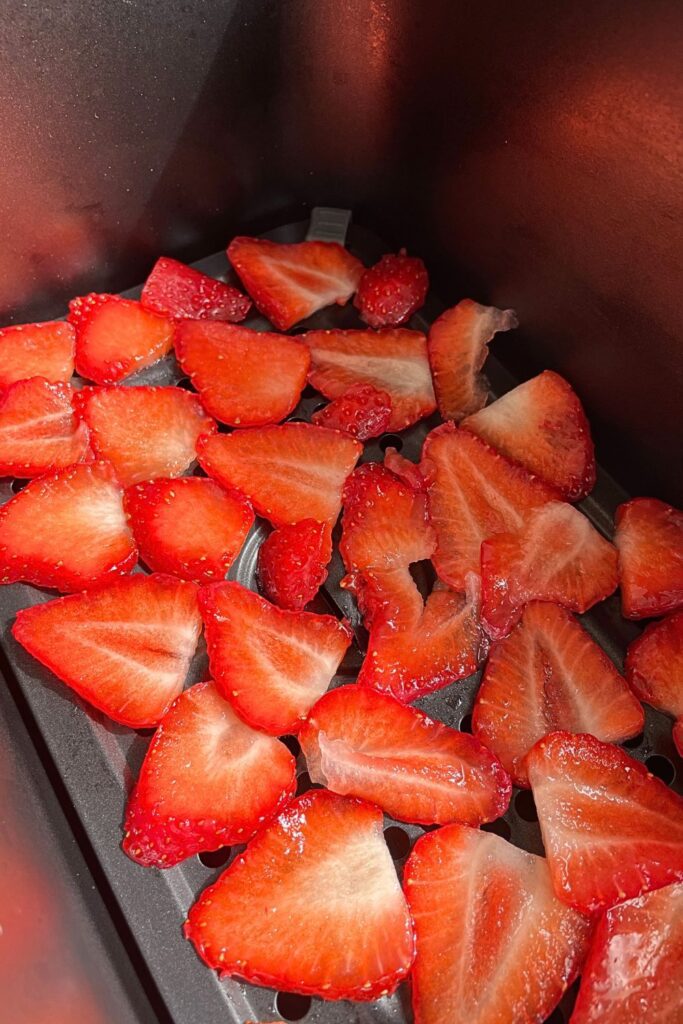
Arrange the Strawberries in the Air Fryer: Place a parchment paper in the air fryer basket and then lay strawberry slices in a single layer on the air fryer tray or basket, ensuring they are not overlapping. This allows for even airflow and dehydration.
Dehydrate in the Air Fryer: Place the tray or basket into the air fryer. Dehydrate the strawberry slices at the low temperature 60 C for about 6 hours, checking periodically. The exact time may vary depending on the thickness of your slices and the specific model of your air fryer. The strawberries are ready when they are dried, slightly shriveled, and have a chewy texture.
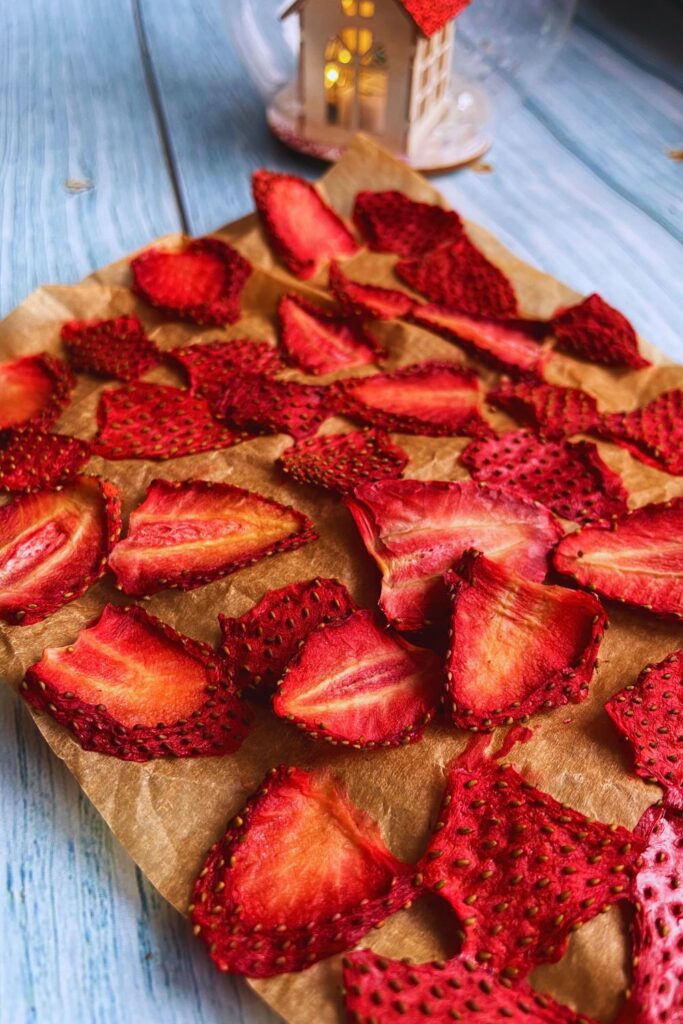
Cool and Store: Once dehydrated, remove the strawberry chips from the air fryer and let them cool completely They will crisp up slightly as they cool. Store the dehydrated strawberry chips in an airtight container at room temperature. They should stay crispy and flavorful for several weeks.
Enjoy Your Strawberry Chips: Use your homemade dehydrated strawberry chips as a healthy snack on their own, or add them to cereals, yogurt, granola, or desserts for a burst of natural strawberry flavor.
By using an air fryer for dehydration, you can achieve crispy, flavorful strawberry chips without the need for a dedicated dehydrator. Adjust the dehydration time based on your preference for texture, and experiment with different seasoning options like cinnamon or a sprinkle of sugar before dehydrating for added flavor variations.
- Pro tip: Make similar sized cuts for evenly cooked strawberry chips.
- Pro tip: Lay them in single layer for proper dehydration.
- Pro tip: Don’t forget to use a parchment paper for easy cleaning and lifting.
Storing Dehydrated Strawberry Chips
Storing dehydrated strawberry chips properly will help maintain their quality and extend their shelf life. Here’s how you can do it:
Cooling Process: Before storing, allow the dehydrated strawberry chips to cool completely at room temperature. This prevents condensation inside the storage container.
Choose the Right Container: Use airtight containers such as glass jars or plastic containers with tight-fitting lids. Mason jars or vacuum-sealed bags also work well.
Avoid Moisture: Moisture is the enemy of dehydrated foods. Make sure the strawberry chips are fully dry before storage. Any residual moisture can lead to mold growth.
Add Desiccant Packets (Optional): If you live in a humid environment or want to be extra cautious, you can add food-safe desiccant packets to absorb any moisture inside the container.
Store in a Cool, Dark Place: Keep the container in a cool, dry, and dark location. Avoid exposure to sunlight or heat, as these can degrade the quality of the strawberries.
Label and Date: Always label the container with the contents and date of dehydration. This helps you keep track of freshness and use them in a timely manner.
Regularly Check for Moisture: Periodically check the container for any signs of moisture or spoilage. If you find any, remove the affected chips immediately.
By following these steps, your dehydrated strawberry chips should stay fresh and flavorful for an extended period. They are great for snacking, adding to granola, or using in baking recipes. Enjoy your homemade strawberry chips!

Air Fryer Dehydrated Strawberry Chips
Equipment
- Air Fryer With Dehydration Option
Ingredients
- 250 g Strawberries
Instructions
- Wash and drying fresh strawberries. Remove the stems and slice the strawberries into uniform, thick slices.
- Place a parchment paper in the air fryer basket and then lay strawberry slices in a single layer on the air fryer tray or basket, ensuring they are not overlapping.
- Dehydrate the strawberry slices at the low temperature 60 C for about 6 hours, checking periodically.
- Once dehydrated, remove the strawberry chips from the air fryer and let them cool completely They will crisp up slightly as they cool.
- Store the dehydrated strawberry chips in an airtight container at room temperature. They should stay crispy and flavorful for several weeks.
If you like this recipe, you might like my other recipes too. I would like to invite you to subscribe to my mailing list which is absolutely free. It will help you get updates on all my future posts. Next time when I post a similar recipe or something interesting you will get notified if you are on our mailing list. Thank you for checking my blog post.
Some Recipe Suggestions:
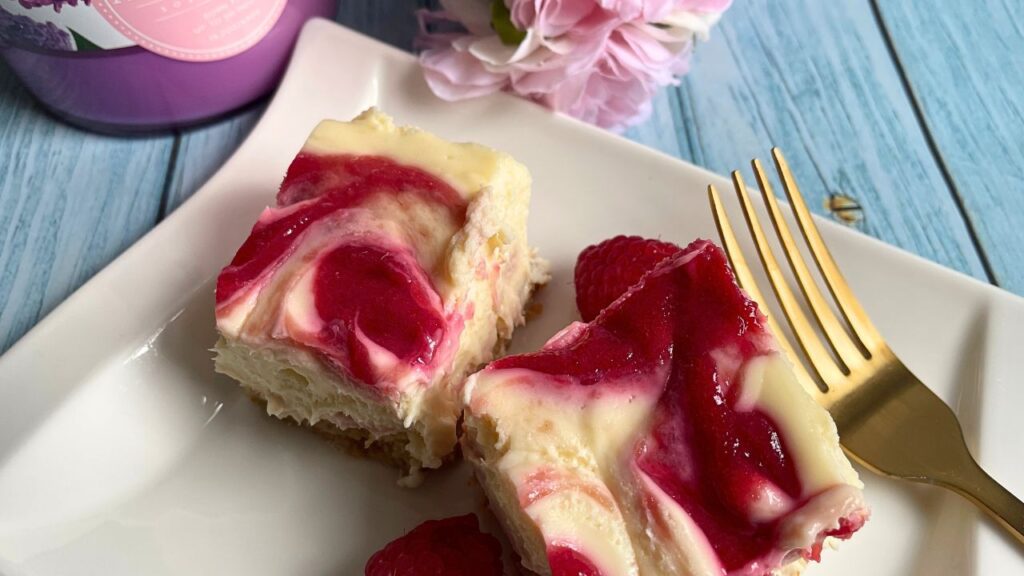
White Chocolate Raspberry Cheesecake
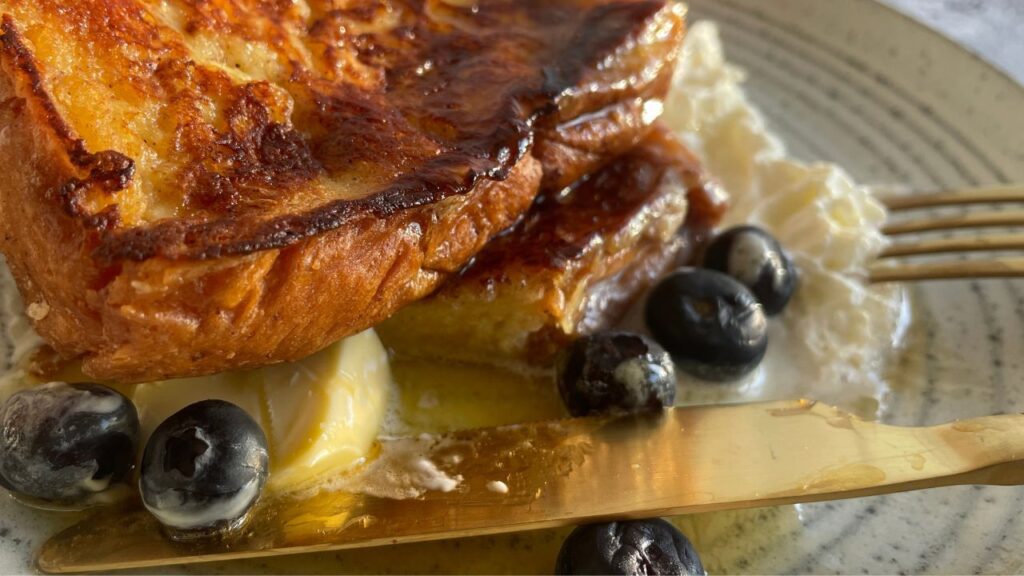
French Toast Recipe
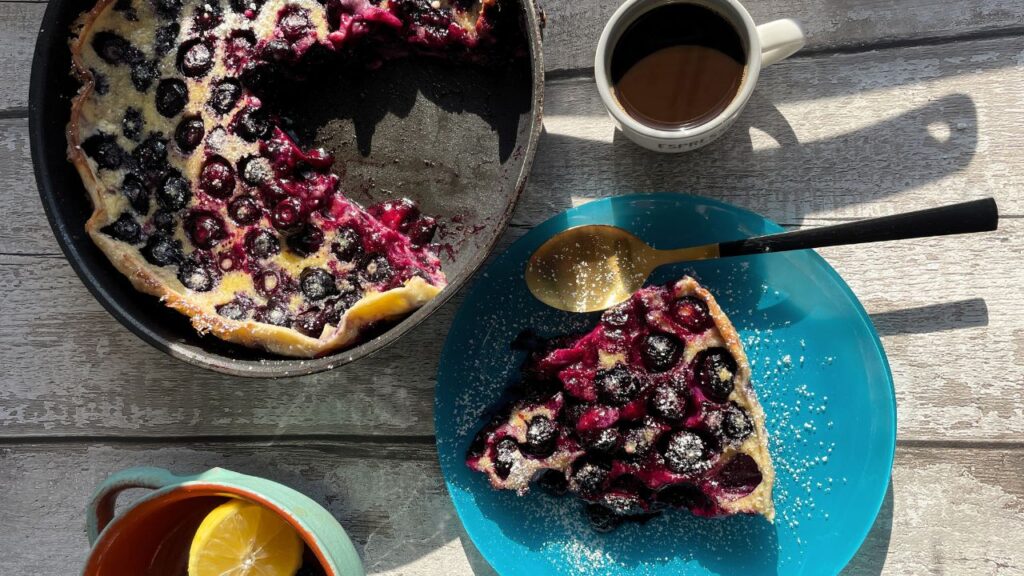
Dutch Baby Pancakes
The post Air Fryer Dehydrated Strawberry Chips appeared first on Bubli's World Cuisine.
]]>The post Air Fryer Kale Chips appeared first on Bubli's World Cuisine.
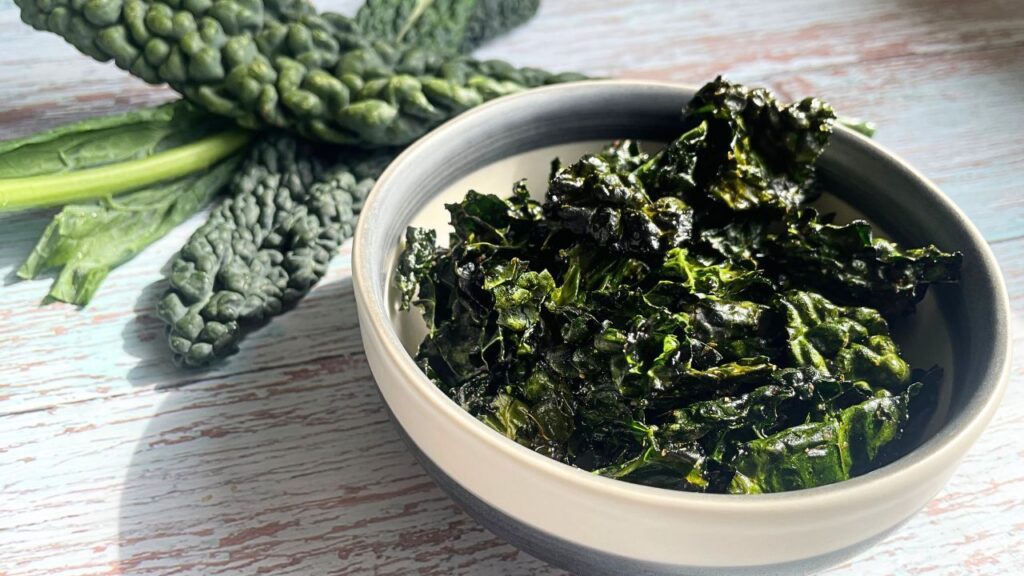
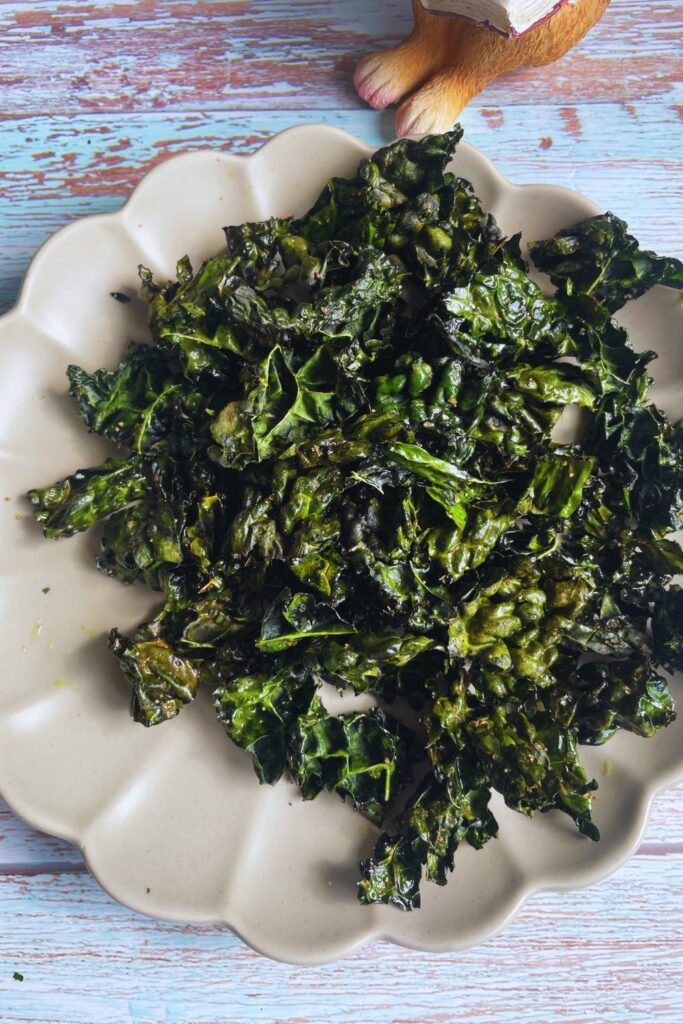
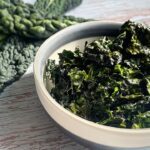
]]>air fryer kale chips are crunchy leafy heathy snacks. They are amazing as addition nutrients to anyone’s diet. it takes just 5 minutes to make these crispy chips alternative low carb snack!
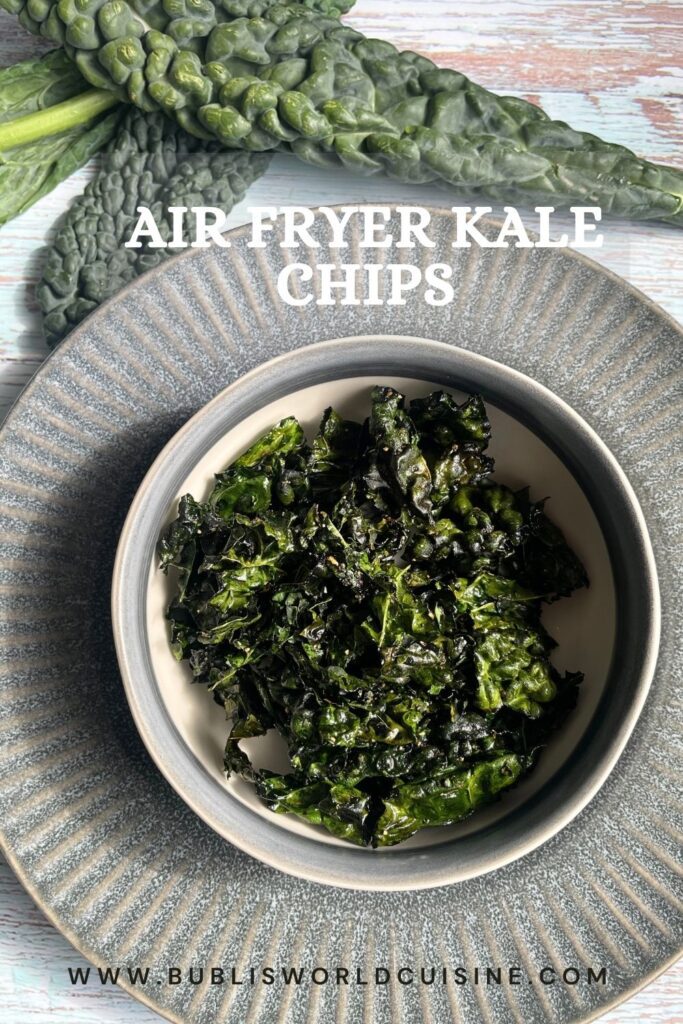
Looking for a wholesome snack? Try our Air Fryer Kale Chips! Crunchy, nutritious, and downright addictive. Say goodbye to greasy potato chips! Switch your regular potato or other carb loaded chips with this healthy nutrient rich Kale chips that’s air fried and you will love it. These quick plant based snack is healthy and will be a healthy choice over potato chips.
Air Fryer Kale Chips:
Air fryer Kale chips are crunch, light and tasty snack. When they are made in the air fryer the frying time is very quick to due the rapid air heat cooking process that results in more nutrients and vitamins packed crunchy salty snack. Air fried Kale chips comes together much faster than oven baked ones.
These crispy vegetable chips are very popular among health conscious people and kids love them as well.
Health benefits Of Kale
Kales are amazing leafy greens and brings a lot of options for using it in healthy diet. Kale is used in numerous ways. They are popular both for raw and cooked consumptions. Adding Kale leaves in fruit juice adds healthy fiber and gives it a punch. Possible health benefits of kale include lowering the risk of type 2 diabetes, protecting against heart disease, and helping prevent constipation. Kale is rich in nutrients which improves bone, skin, and hair health.
Why Air Fryer kale chips are so popular:
Quick: Air fryer kale chips take just 5 minutes to go from leafy crunchy to fried crunchy without the use of lots of oil.
Easy: Air fryer kale chips are so easy that even kids can make them with slight supervision. Let them tear the leaves in small portions and then they can put seasoning of their choice and voila!
Healthy Snack: Kale leaves are loaded with nutrients. Air fried kale chips makes a great healthy snack.
Crunchy Salty Nibble: These plant based snack are like nibbles. You can carry them to work, school or even to your picnic and enjoy something healthy and homemade.
Good For Kids: Kale chips are much healthier than potato chips deep fried in oil. Kids actually love them as they have light flavor and saltiness and enough crunch to keep them munching on something leafy and healthy.
My other Healthy recipes you might like:
Recipe Video: Air Fryer Kale Chips Recipe
I have created a mini recipe video for making these healthy Air Fryer Kale Chips snacks and have already posted the video on my YouTube channel Bubli’s World Cuisine. It’s a step by step visual demonstration on how to make this plant based nutritious snacks at home for the whole family. To see the recipe in action from start to finish, please click on the video. And for a printable version of this recipe please check the recipe card at the end of the blog:
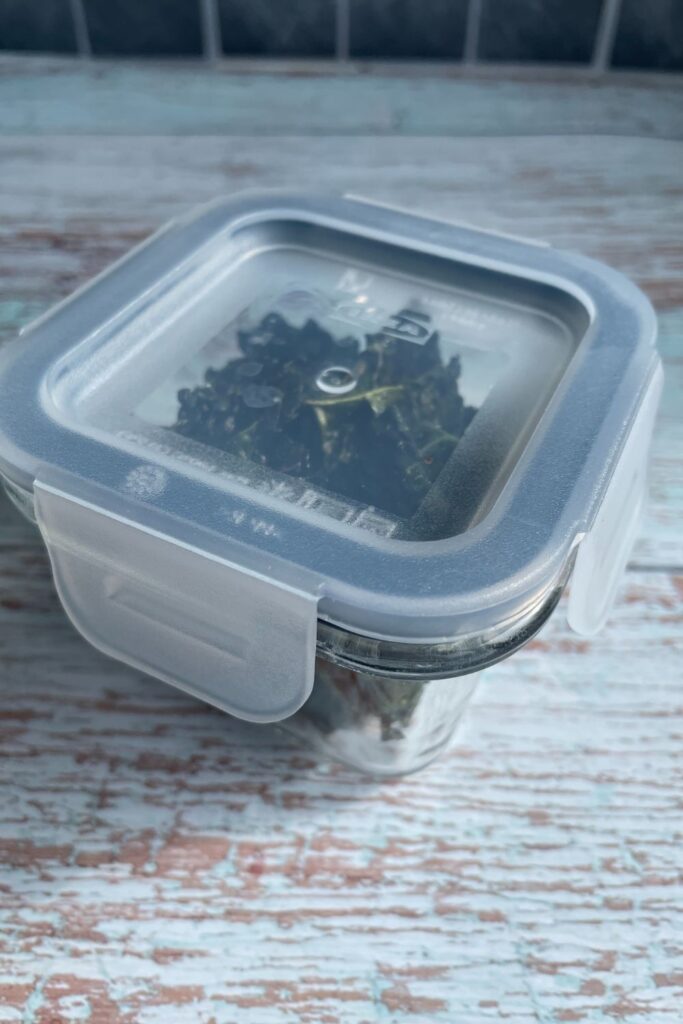
How to Store Kale Chip:
The good news is, you can make these snacks ahead of time and enjoy for couple of days. Although it takes just 5 minutes to make air fryer healthy Kale chips but you can keep them crispy for couple of days when you store this leafy snack in an air tight container. But these healthy low carb chips are best enjoyed fresh and it takes just few minutes to make them fresh in the air fryer.
How To Make Air Fryer Kale Chips
Ingredients List
Kale – Fresh Kale leaves makes the delicious chips. Wash them thoroughly and pat dry to make ready for the fry.
Olive Oil – You may use Olive, Avocado or Rapeseed oil.
Salt – Just a little will go long way.
Black Pepper Powder – You can skip using it if kids find it too strong.
Powder or Granules – Any flavoring of your choice is perfect for Kale chips. I like to use Garlic and onion granules.
Dried Herb – I like to use some dried herbs such as Oregano but it’s not crucial.
Instructions
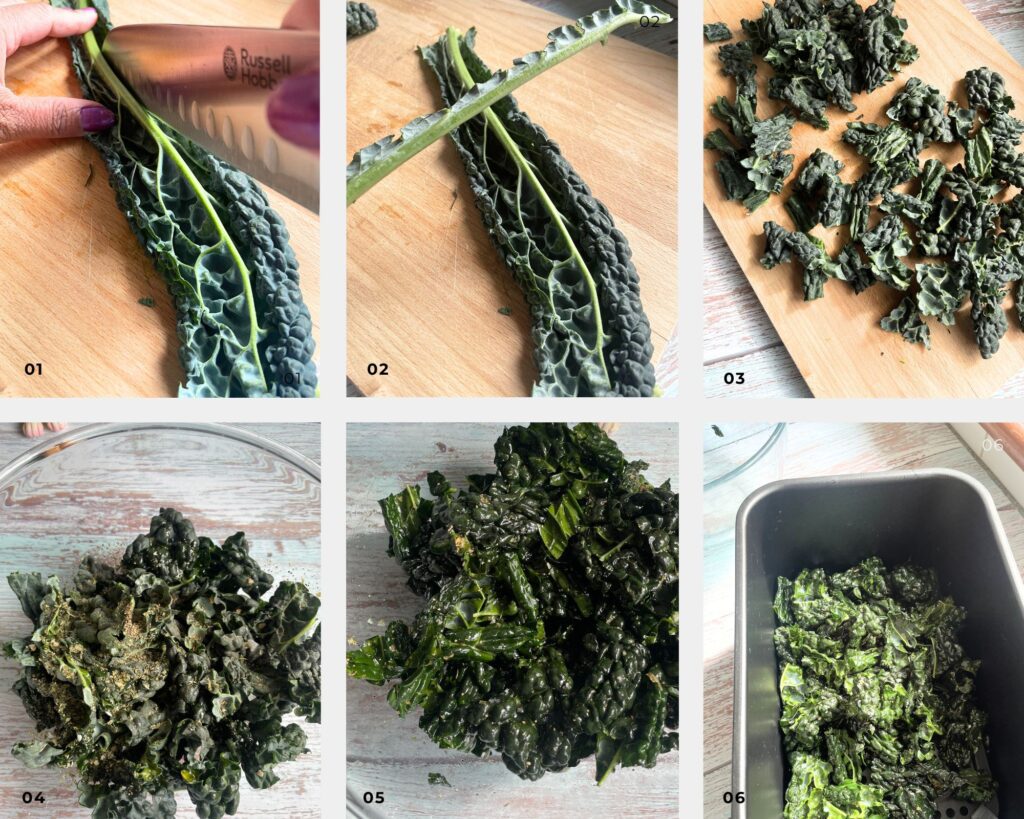
Wash and dry your kale leaves properly. Remove the tough centers of the stem, then either cut with a knife or tear the leaves into smaller pieces. Add to a large bowl.
Toss with oil and seasonings of choice. I like to use Olive oil and Avocado Oil. Seasoning is personal preference. I mostly like to add in salt and pepper to taste and little garlic flakes, oregano and sometimes onion granules. I also have included some suggestions below.
Air Fry. Place the seasoned kale leaves in air fryer basket. Set air fryer temperature to 400°F/200°C and set timer for just 5 minutes or until they are crispy! You may shake the basket or stir after two minutes to help the kale chips cook evenly.
Discover the guilt-free delight of Air Fryer Kale Chips! This easy recipe will satisfy your cravings for a healthier snacking option. Perfect for bloggers on a low carb journey.
Air Fryer kale Chips
Ingredients
- 100 g kale Leaves
- 1 Tbsp Olive Oil
- pinch Salt
- 1/4 tsp Black Pepper Powder
- 1/8 tsp Garlic Granules
- 1/2 tsp Oregano
Instructions
- Remove the tough centers of the Kale leaf stems, and cute them into smaller pieces. Add to a large bowl.
- Toss with Olive oil, Salt, Black pepper powder, Garlic and Onion granules, oregano or seasonings of your choice.
- Place the seasoned kale leaves in air fryer basket and fry @ 200 C for 5 minutes or until they are crispy.
Tips For Making The Best Kale Chips:
Make sure to dry your kale leaves before cooking. You can do this by leaving the washed or torn pieces of kale out on a towel for about an hour, or for a quicker solution use a salad spinner.
Do not overcrowd the leaves. Overcrowding will not help them get cooked properly which will result in not crispy or burnt kale chips.
Use an air fryer basket liner for easy clean up. I buy mine from Amazon and use them for most of the air frying that I do.
Seasoning Ideas For Making Air Fryer Kale Chips
The best thing about making Air fryer healthy Kale chips are you can use any seasoning of your choice. In this recipe I have used salt, pepper, garlic and oregano. many other options could be:
- Onion Powder
- Paprika Powder
- Chili Flakes
- Mustard Powder
- Ginger Powder
- Mild Spice Mix
If you like this recipe quick and easy plant based healthy snack recipe, you might like my other recipes too. I would like to invite you to subscribe to my mailing list which is absolutely free. It will help you get updates on all my future posts. Next time when I post a similar recipe or something interesting you will get notified if you are on our mailing list. I post 4-5 recipes every single week and more new and useful easy-to follow recipes are coming up in the coming days. Thank you for checking my blog post. All the best!
Some Recipe Suggestions:
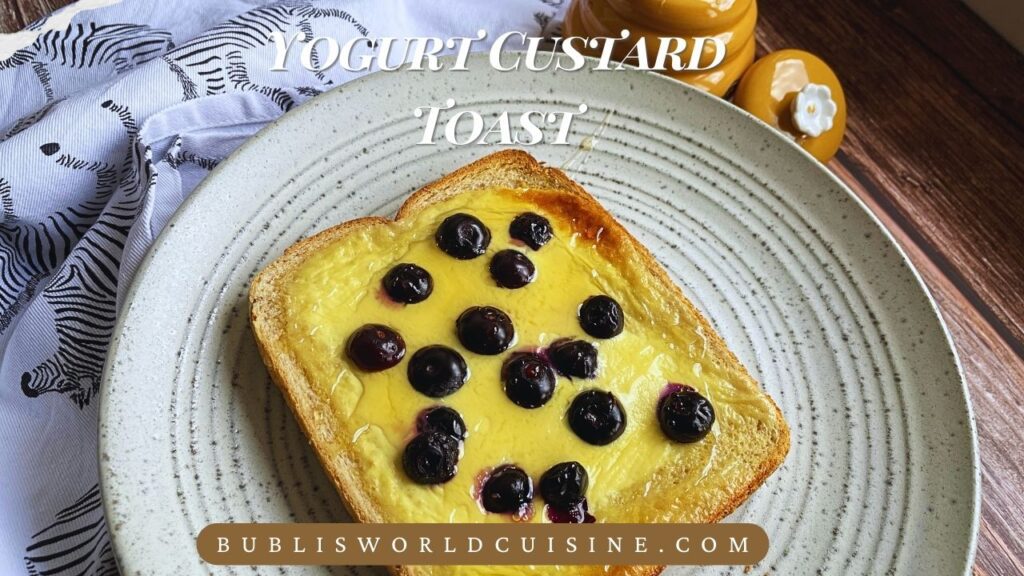
Custard Yogurt Toast
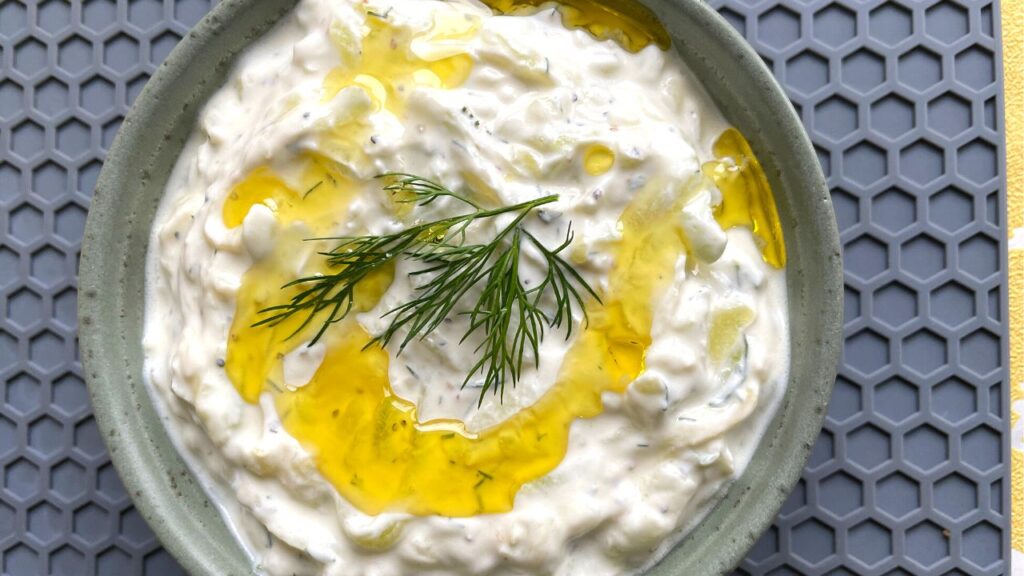
Tzatziki Sauce
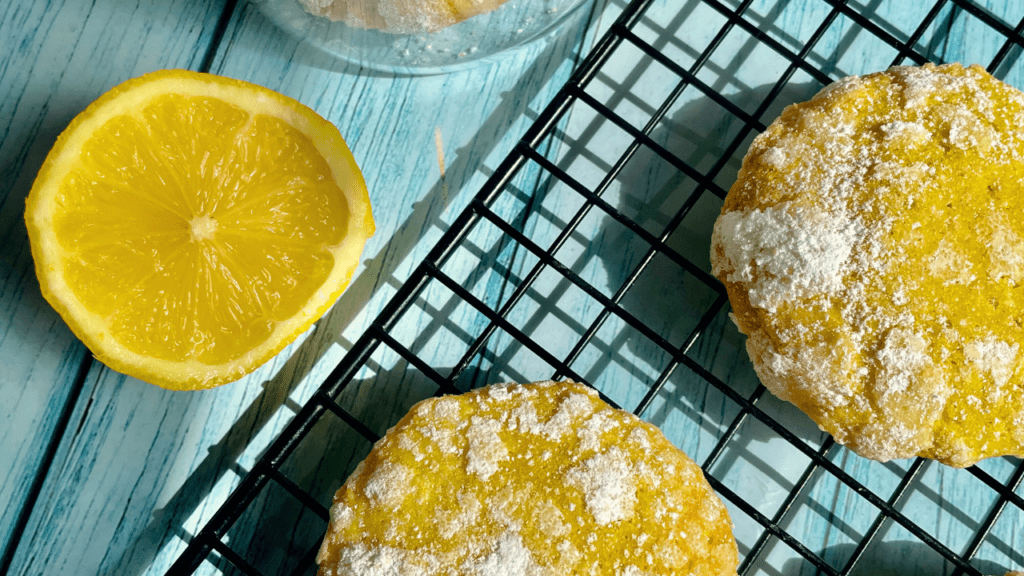
Lemon Crinkle Cookies
The post Air Fryer Kale Chips appeared first on Bubli's World Cuisine.
]]>The post Oat Milk appeared first on Bubli's World Cuisine.
]]>Perfect Substitute for Dairy & Nut free Milk.
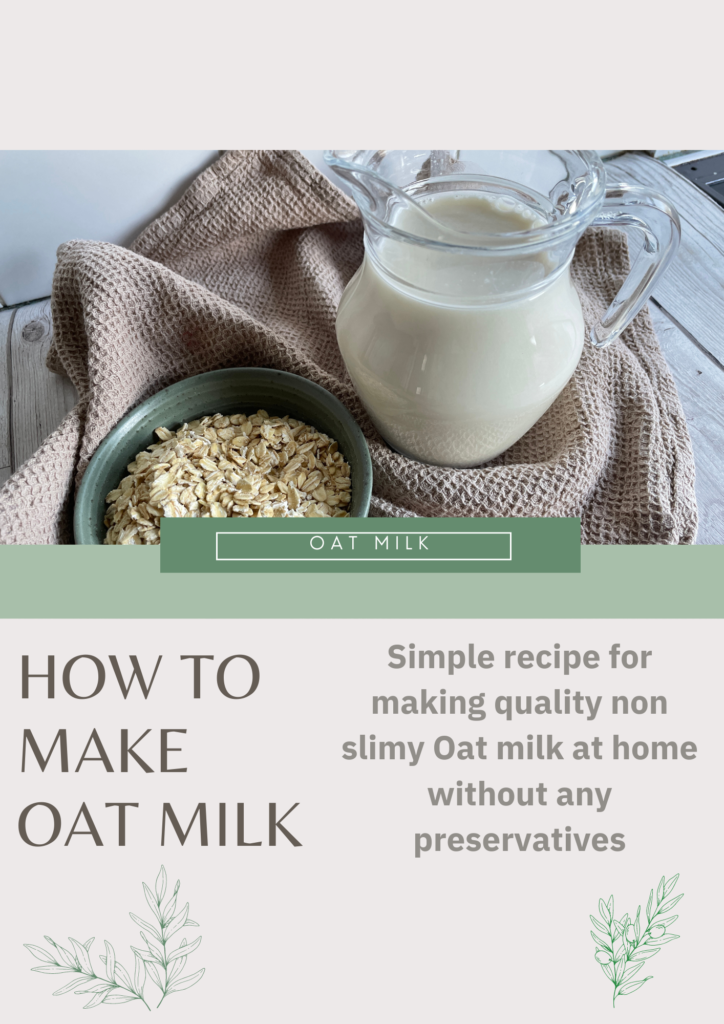
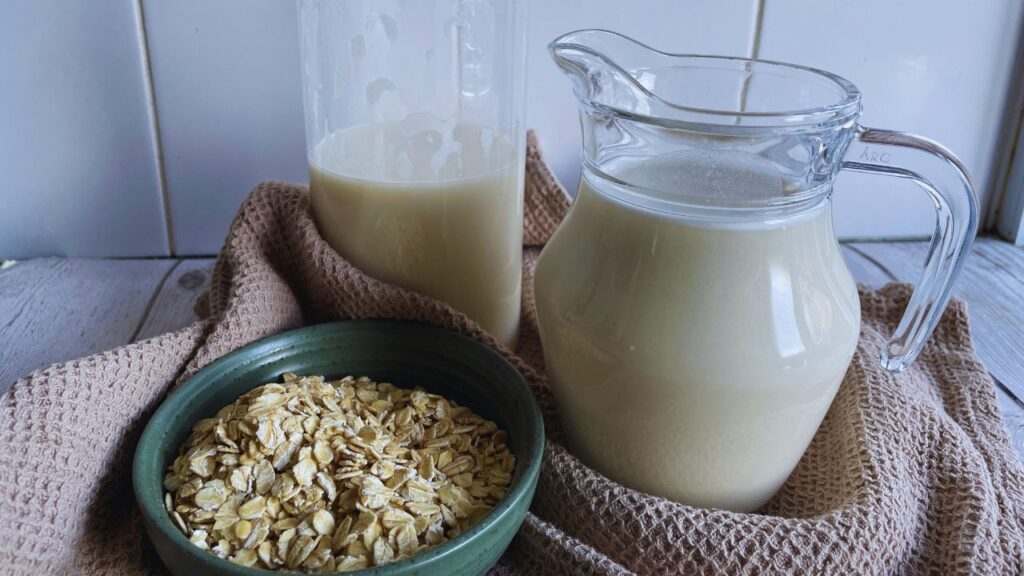
Oat milk has really taken the world by storm. It’s rich and creamy with just the right amount of sweetness. It works so great for coffee that it has become a Barista favourite for milk alternative. Not only in coffee but it adds great creaminess to cereals and smoothies too. Not everyone can tolerate lactose or prefers not to. Now there are nut milk which again is not everybody’s gut friendly. But oat milk can be a great substitute. Oat milk are really pricy if you buy it from a supermarket shelf. On the other hand if you make it at home it’s super affordable and with the tips and tricks you will get from this vlog will help you make your own Oat milk taste great as brand ones.
Otley is one of the favourite brands but Oatly oat milk must goes through a lot of processing as they need to increase shelf life. If you want to opt in for a healthier oat milk tasting as great as a quality store bought brand, this recipe will come very useful for you.
RECIPE VIDEO: Oat Milk
This is a straight forward recipe but if you are more comfortable with a video demonstration then you can check my video on this recipe. I have already prepared and shared a video of this Oat milk recipe video on my YouTube channel Bubli’s World Cuisine. It’s a step by step visual demonstration on how to make this easy vegan, nut free milk at home. To see the recipe in action from start to finish, please click on the video. And for a printable version of this recipe please check the recipe card at the end of the blog:
Today I’m going to share with you the recipe for making oat milk or in other word healthy plant based milk. Making it at home means using no preservatives and that by itself is a healthy option. However, there is something unwanted you might get and that is slimy milk. Now, in my recipe I will share with you some useful tips and tricks for making it non slimy and you will end up getting the right consistency.
USES FOR OAT MILK
Now this is just oat milk but you can turn it into any flavour if your choice. Add fruits and veggies to turn it into a delicious smoothie or just substitute it for dairy on your recipes. Many people are allergic to nuts and hence nut milk are not an option for them. Someone allergic to nuts but do not want to include dairy milk in their diet can easily prepare and consume this milk. I am glad that I tried this recipe. I know I will be doing so many experiments as I will never have to buy it from supermarket.
HOW TO MAKE OAT MILK
Ingredients
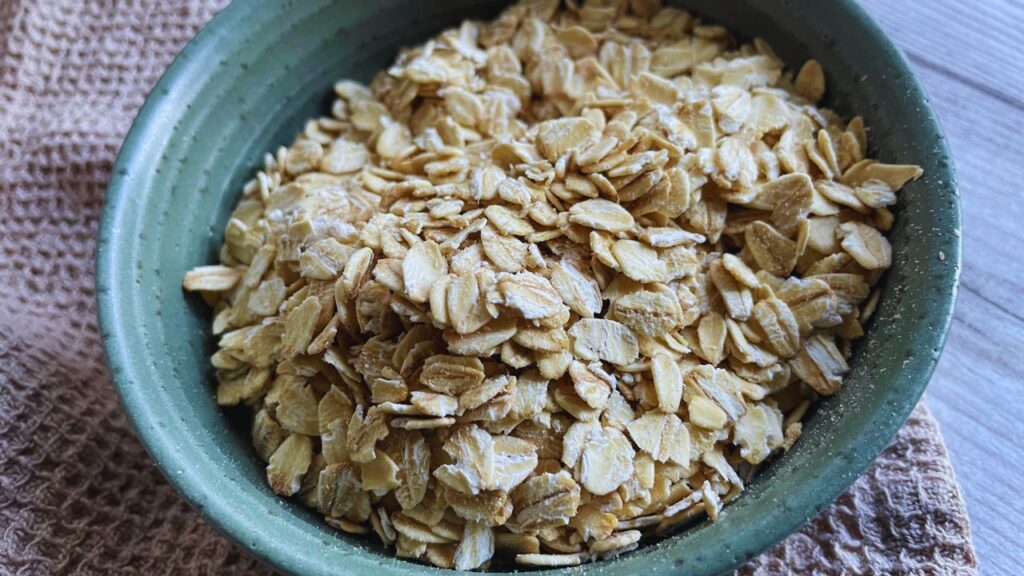
1 Cup Oats
4 Cups Icy Cold Water
1 Tbsp Maple Syrup or Honey
1 tsp Vanilla Extract
INSTRUCTIONS
Step 1: In a blender add Oat and icy cold water. Add a tablespoon of honey or maple syrup for sweetness and for flavouring add 1 teaspoon of good quality vanilla extract.
Step 2: Blend it on high speed for around 30 seconds.
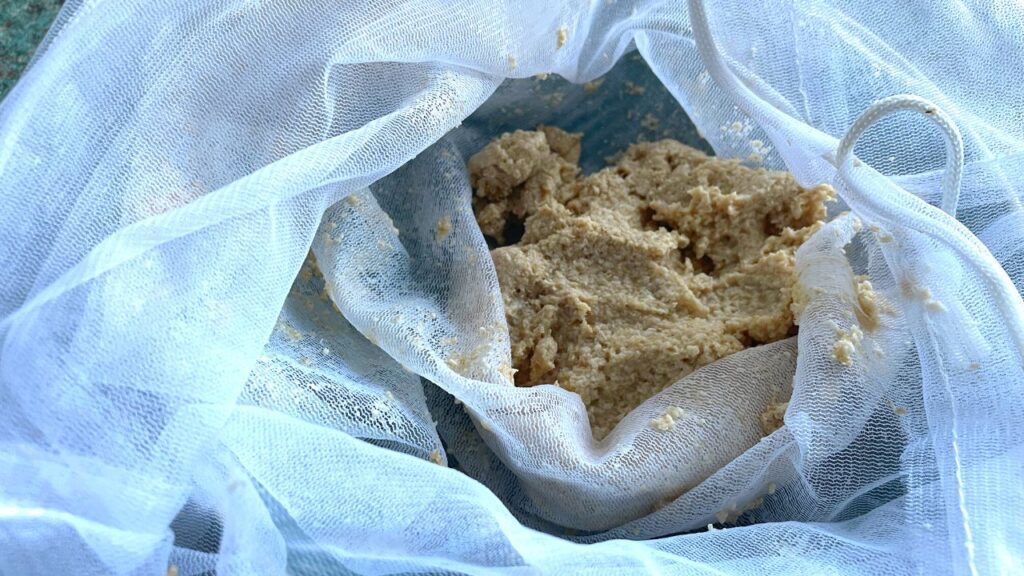
Step 3: Use a nut bag to sieve milk. Oat milk is ready.
Oat Milk
Ingredients
- 1 Cup Oats
- 4 Cups Icy Cold Water
- 1 Tbsp Maple Syrup or Honey
- 1 tsp Vanilla Extract
Instructions
- In a blender add Oat and icy cold water. Add a tablespoon of honey or maple syrup for sweetness and for flavouring add 1 teaspoon of good quality vanilla extract. Blend it on high speed for around 30 seconds.Use a nut bag to sieve milk. Oat milk is ready.
- Blend it on high speed for around 30 seconds.Use a nut bag to sieve milk. Oat milk is ready.
SOME RECIPE SUGGESTIONS:
Lemon Salt
All natural cough, cold, phlegm relief syrup
Keto Spinach Tortilla
The post Oat Milk appeared first on Bubli's World Cuisine.
]]>